
TABLE OF CONTENTS
- Where you can use a submenu
- Step 1: Create the menu
- Step 2: Style the submenu bar
- Step 3: Connect the submenu to for each page
- Tips
A microsite is a group of related pages with its own subnavigation, such as a digital program, a fundraising campaign, an annual report, an education department, or an audio tour. A sticky submenu ties those pages together. It appears below your main navigation, stays at the top of the screen as visitors scroll, and can include a call-to-action button, such as Donate or Register.
Where you can use a submenu
You can turn the submenu on for any of these:
- Landing pages
- Default template and Flex Content pages
- Calendar and Festival / Hourly Grid Calendar pages
- Season, Series, and Genre pages
- Age Range, Language, and People Type pages
- Post category pages
The submenu isn't available on individual events or posts, or on tag pages.
Step 1: Create the menu
- Go to Appearance >> Menus, and click create a new menu.
- Enter a Menu Name. Visitors see this name as the label on the submenu bar, so name it for the section, such as "Annual Report" or "Education."
- Add every page that belongs to the microsite, in the order visitors should see them.
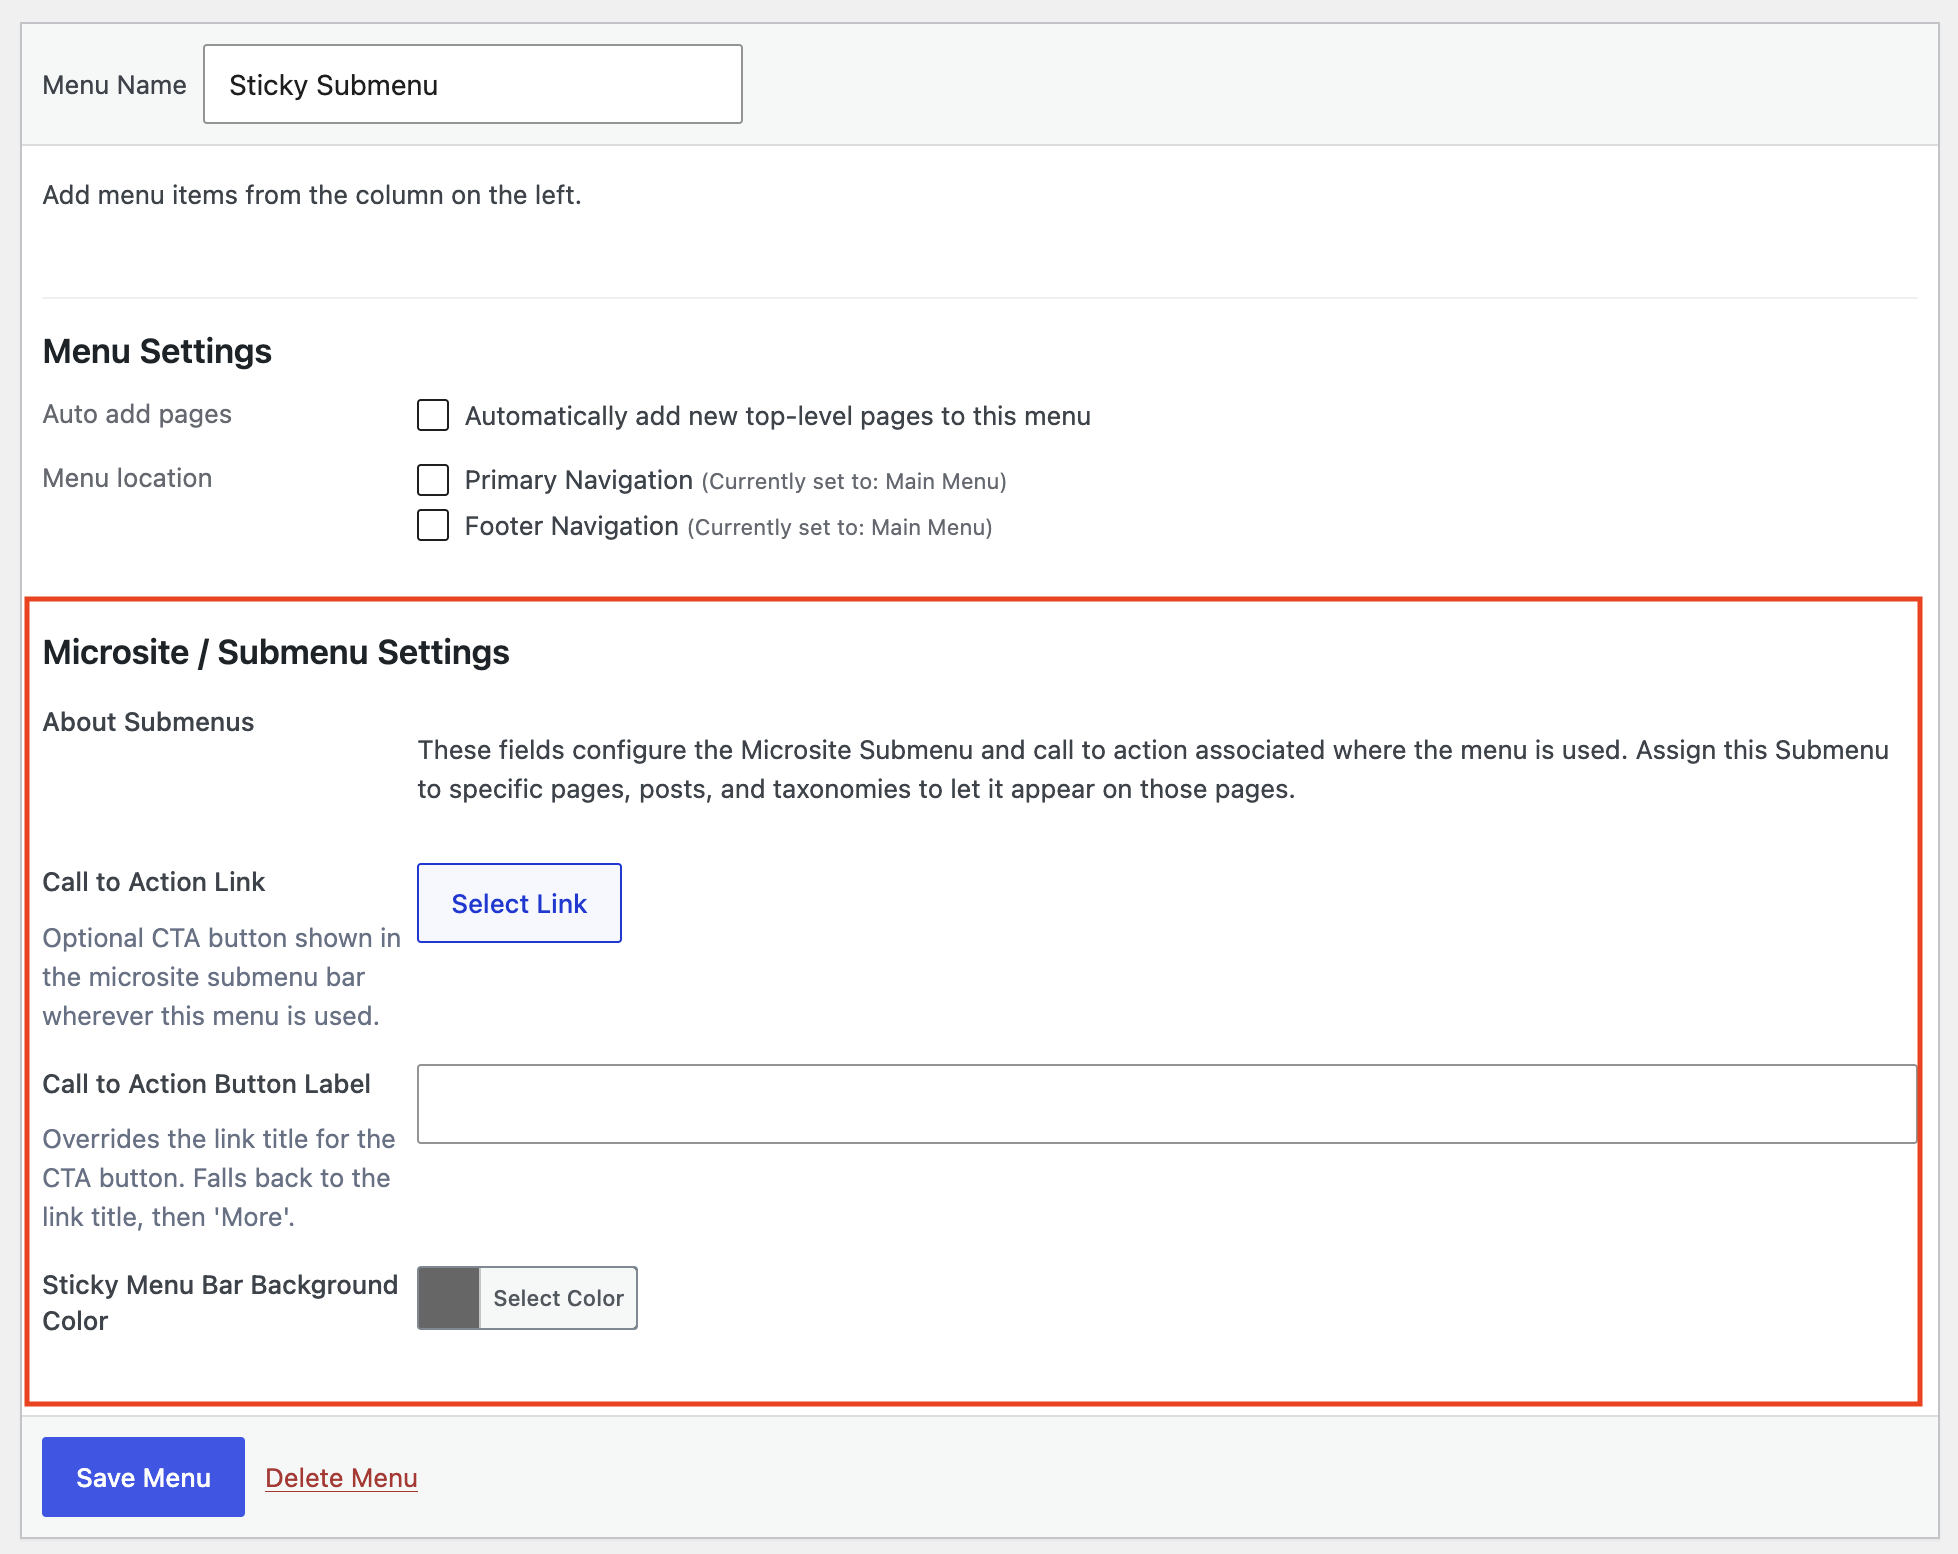
- Under Menu Settings, leave every Display location unchecked. Checking one would replace your main or footer menu.
Step 2: Style the submenu bar
On the same screen, under Microsite / Submenu Settings:
- Choose a Sticky Menu Bar Background Color.
- Optional: add a Call to Action Link, such as your donation page. The button shows the link's title, or you can set Call to Action Button Label to change the text.
- Click Save Menu.
These settings belong to the menu, so every page that shows the submenu uses the same label, color, and button. To change them, edit the menu once instead of each page.
Step 3: Connect the submenu to for each page
- Edit a page that belongs to the microsite. For a Season, Series, Genre, or other category, edit it under its menu, for example Events >> Series.
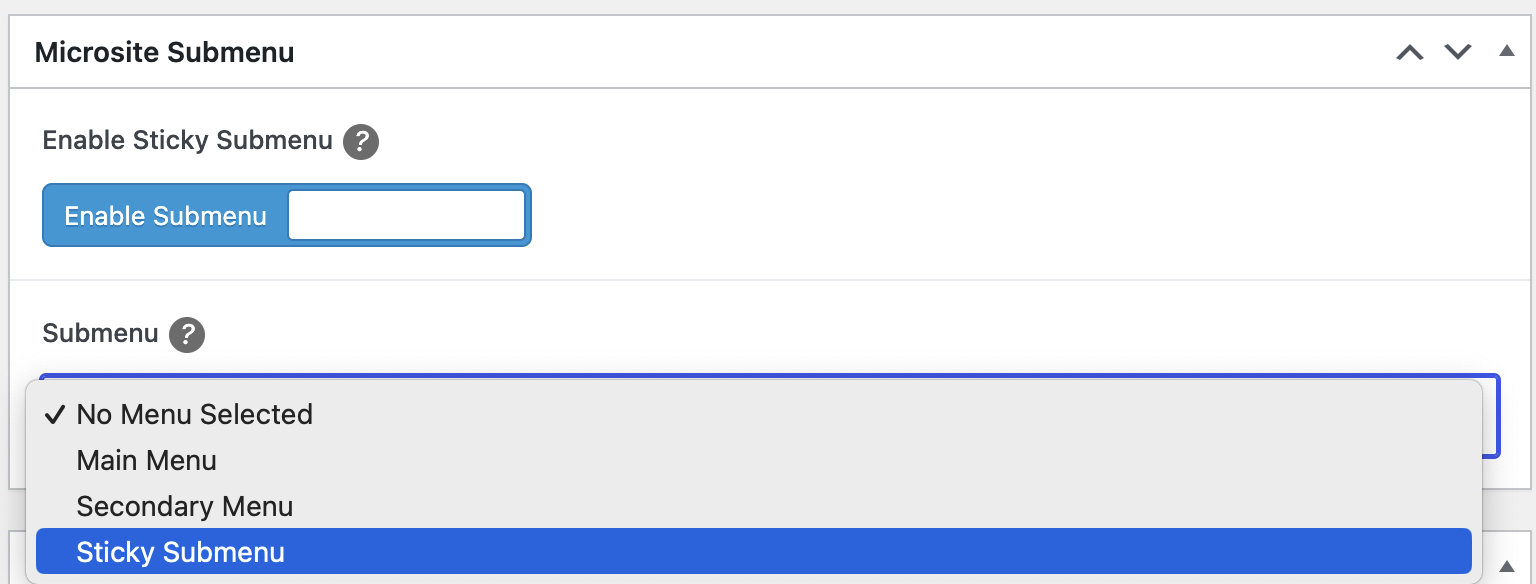
- In the Microsite Submenu box, turn on Enable Sticky Submenu.
- In Submenu, choose the menu you created in Step 1.
- Update the page.
Repeat for each page in the microsite, including any pages that aren't in the menu but should still show it.
Tips
- Keep the submenu short: 3 to 7 pages, like any menu.
- A landing page makes a strong hub for the microsite. Add it as the first item in the menu.
- To link pages that visitors reach through a private link, see Creating a Members-Only Portal.
- To remove a page from the microsite, turn off Enable Sticky Submenu on that page, and remove the page from the menu.